Intro
I use a Nikon D3400 for astrophotography. It's not a special astro camera, just a regular DSLR, but I've been slowly figuring out what works with it.
I shoot from my backyard in suburban Osijek, Croatia under Bortle 6-7 skies, so light pollution is always part of the challenge. Even so, with the right settings and enough total exposure time, the Nikon D3400 can still produce results that I'm genuinely proud of. I'm looking forward to my first trip to darker skies, but for now I'm learning and improving from home.
One common limitation of the D3400 is the 30 second exposure limit in manual mode. I'll cover the basic 30 second setup here, and I'll also explain how to go beyond 30 seconds safely using Bulb mode and external control in another blog post.
In this article I'll share the Nikon D3400 astrophotography settings I actually use, both on a simple tripod and with a star tracker. I'll explain why I prefer certain ISO values, how I focus at night, and what changed once I started tracking.
Can You Use the Nikon D3400 for Astrophotography?
Yes.
The Nikon D3400 has everything you need to get started with astrophotography:
- Manual mode
- RAW (.NEF) files
- Up to 30 second exposures
- Bulb mode if you want to go longer
It’s also relatively cheap on the used market, which makes it accessible to many beginners. That said, if you are buying a DSLR specifically for astrophotography today, there are better options available.
One practical limitation of the D3400 is that it does not have a dedicated shutter release port. That means you cannot use a standard wired intervalometer. To control longer exposures or automate shooting, you need to rely on USB control from a computer or other external solutions.
The 30 second limit in manual mode is something you will run into quickly, especially as you increase focal length. On paper, 30 seconds sounds like a lot. In reality, without tracking, you usually cannot even get close to that.
At 35mm, I found that around 4 to 5 seconds was my maximum if I wanted properly round stars. At 100mm, that dropped to around 1 to 1.3 seconds. Anything longer, and star trailing became obvious.
The longer the focal length, the faster stars appear to move across the frame. And the more you zoom into the image later, the more noticeable that trailing becomes.
Like most beginners, I started with just a tripod and no tracking.
What You Can Expect Without a Star Tracker
In the beginning, I used both of my lenses untracked. Most of my early sessions were done with a simple tripod setup.
Typical untracked settings
| Focal length | 35mm or 100mm |
|---|---|
| Aperture | f/2.8 to f/5.6, depending on the lens |
| ISO | 1600 or 3200 |
| Shutter speed at 35mm | 4 to 5 seconds |
| Shutter speed at 100mm | Around 1 second |
| Format | RAW |
Because the exposure time is so short, ISO usually needs to be higher. I often used ISO 1600, and sometimes 3200 when testing limits. That makes the image brighter, but it also increases visible noise, which becomes harder to manage later, especially under city light pollution.
With stacking, you can still get solid results. Calibration frames help a lot at this stage. Constellations, the Orion region, and the Milky Way are all possible from a backyard setup. But faint nebula detail is harder to pull out because you simply cannot collect enough light per frame. On top of that, most deep sky objects are quite small at 35mm or shorter focal lengths.
Tracked vs Untracked: The Difference Is Huge
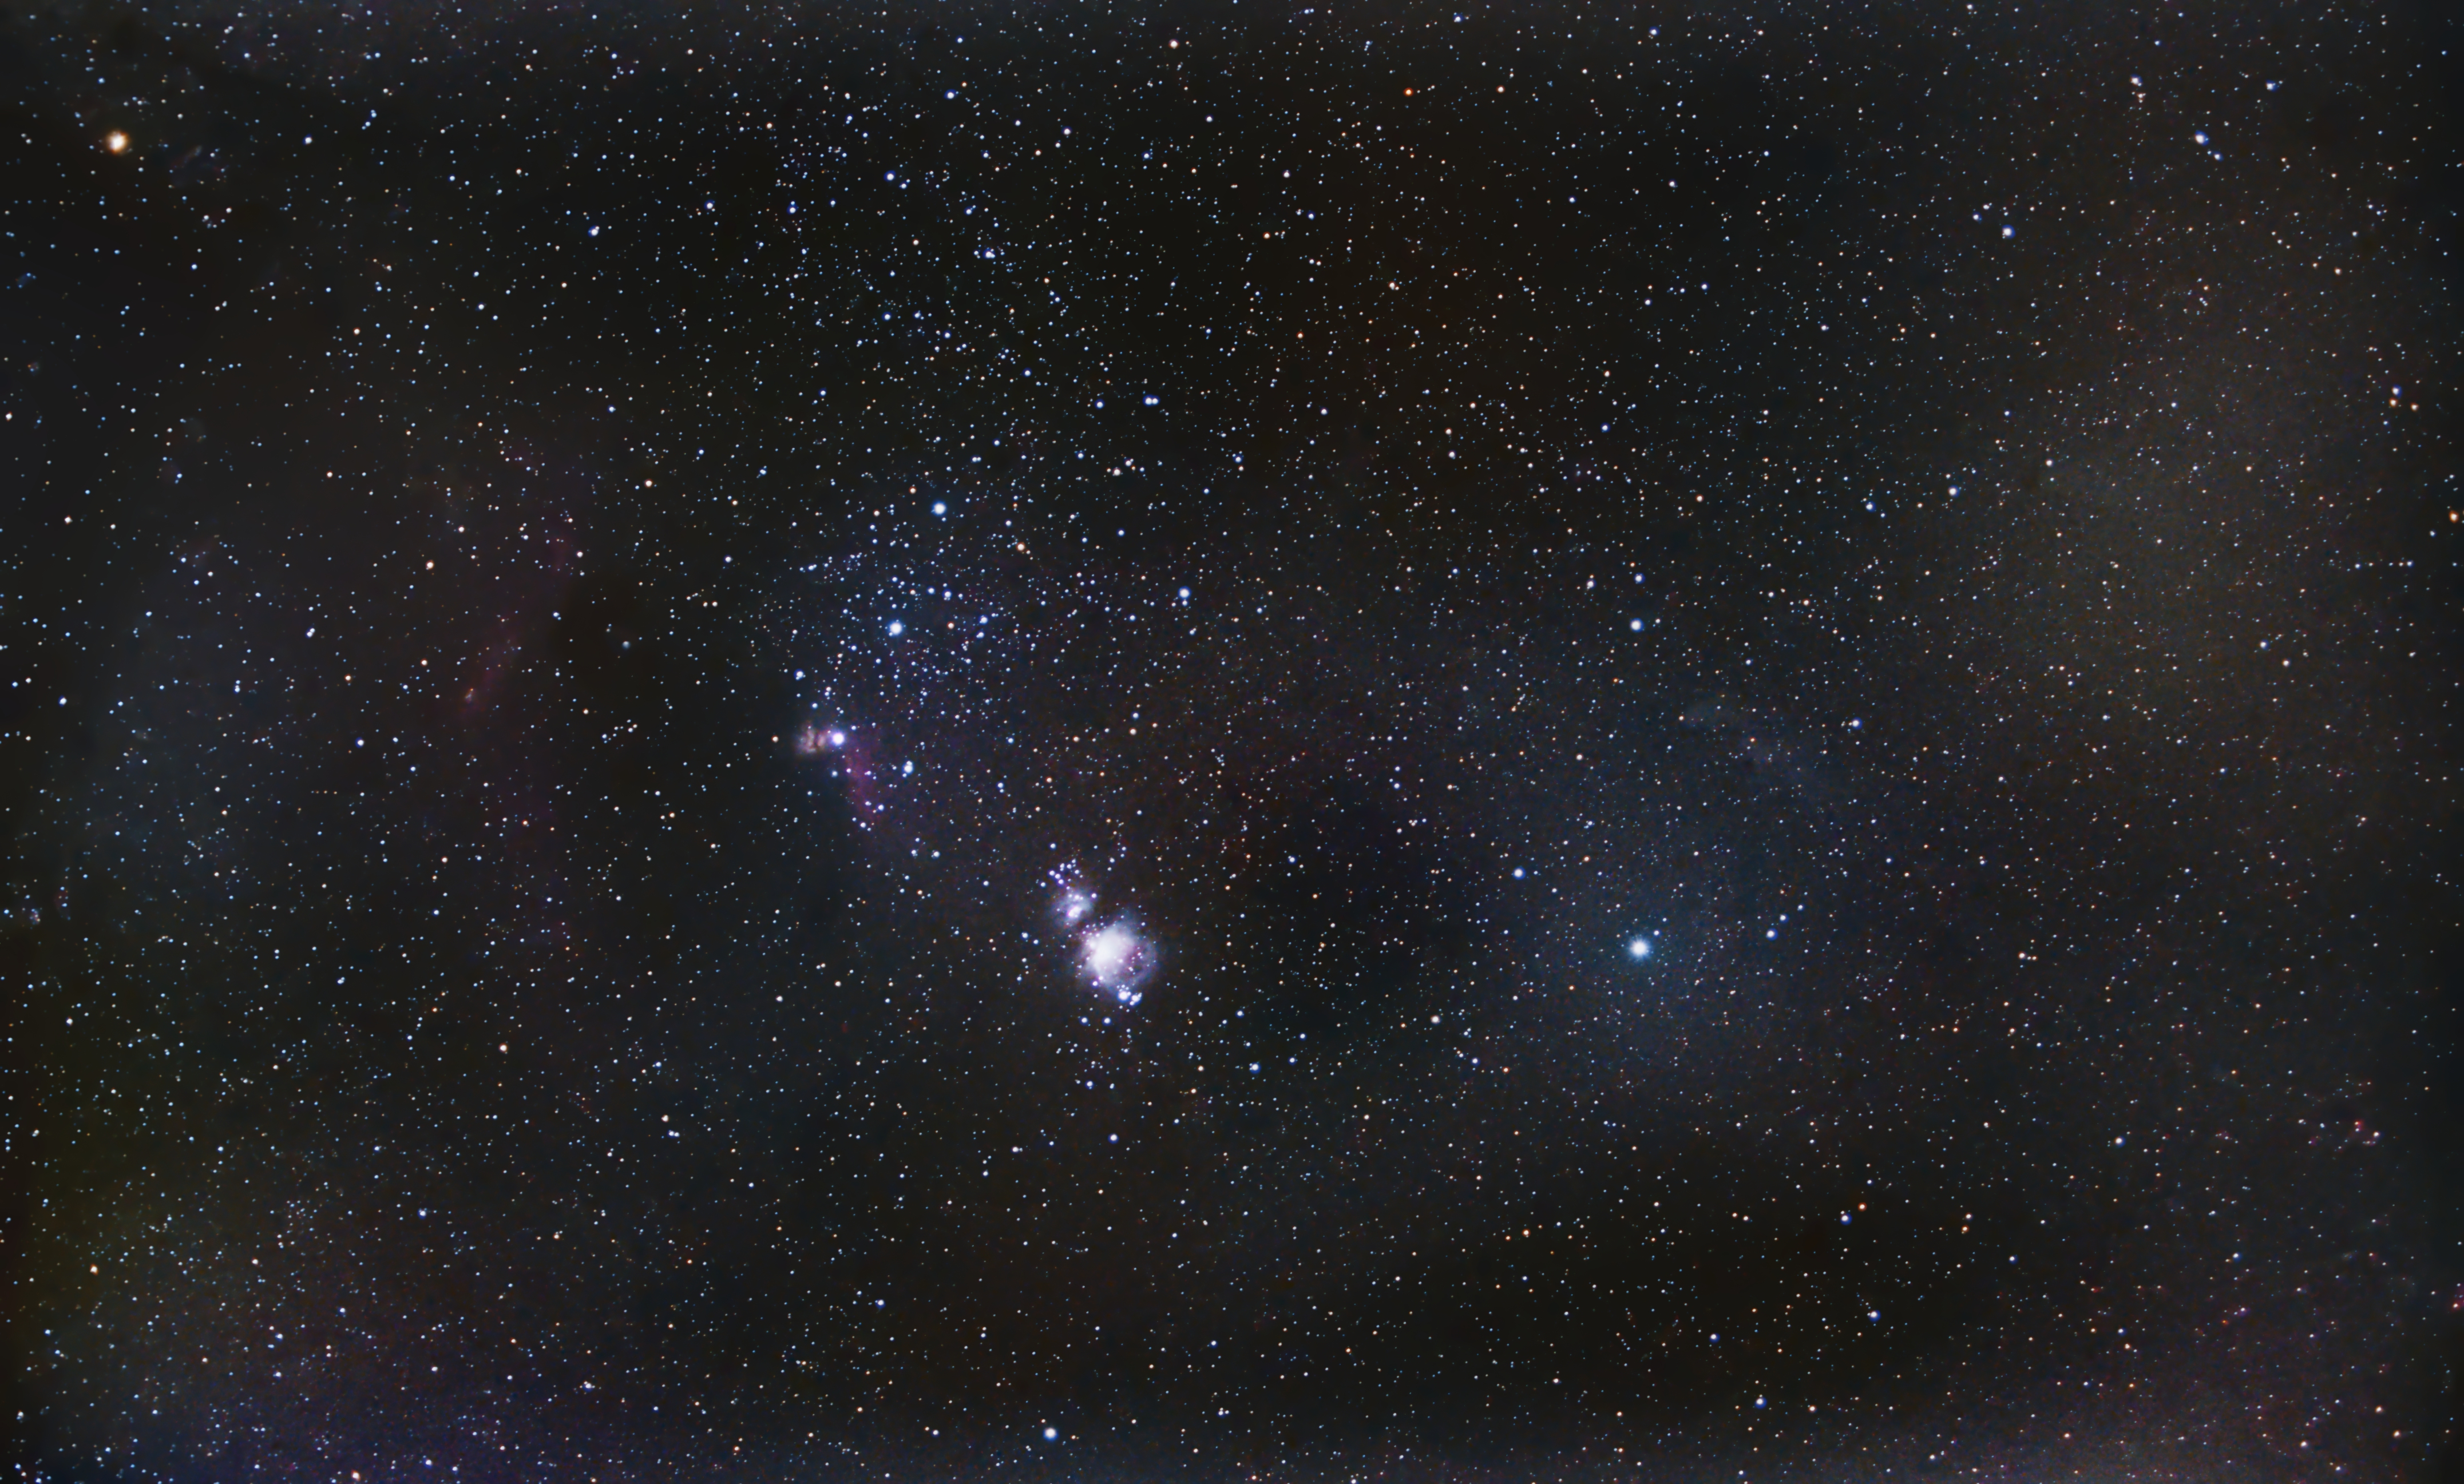
To show the difference clearly, here is a simple comparison using the same 35mm lens.
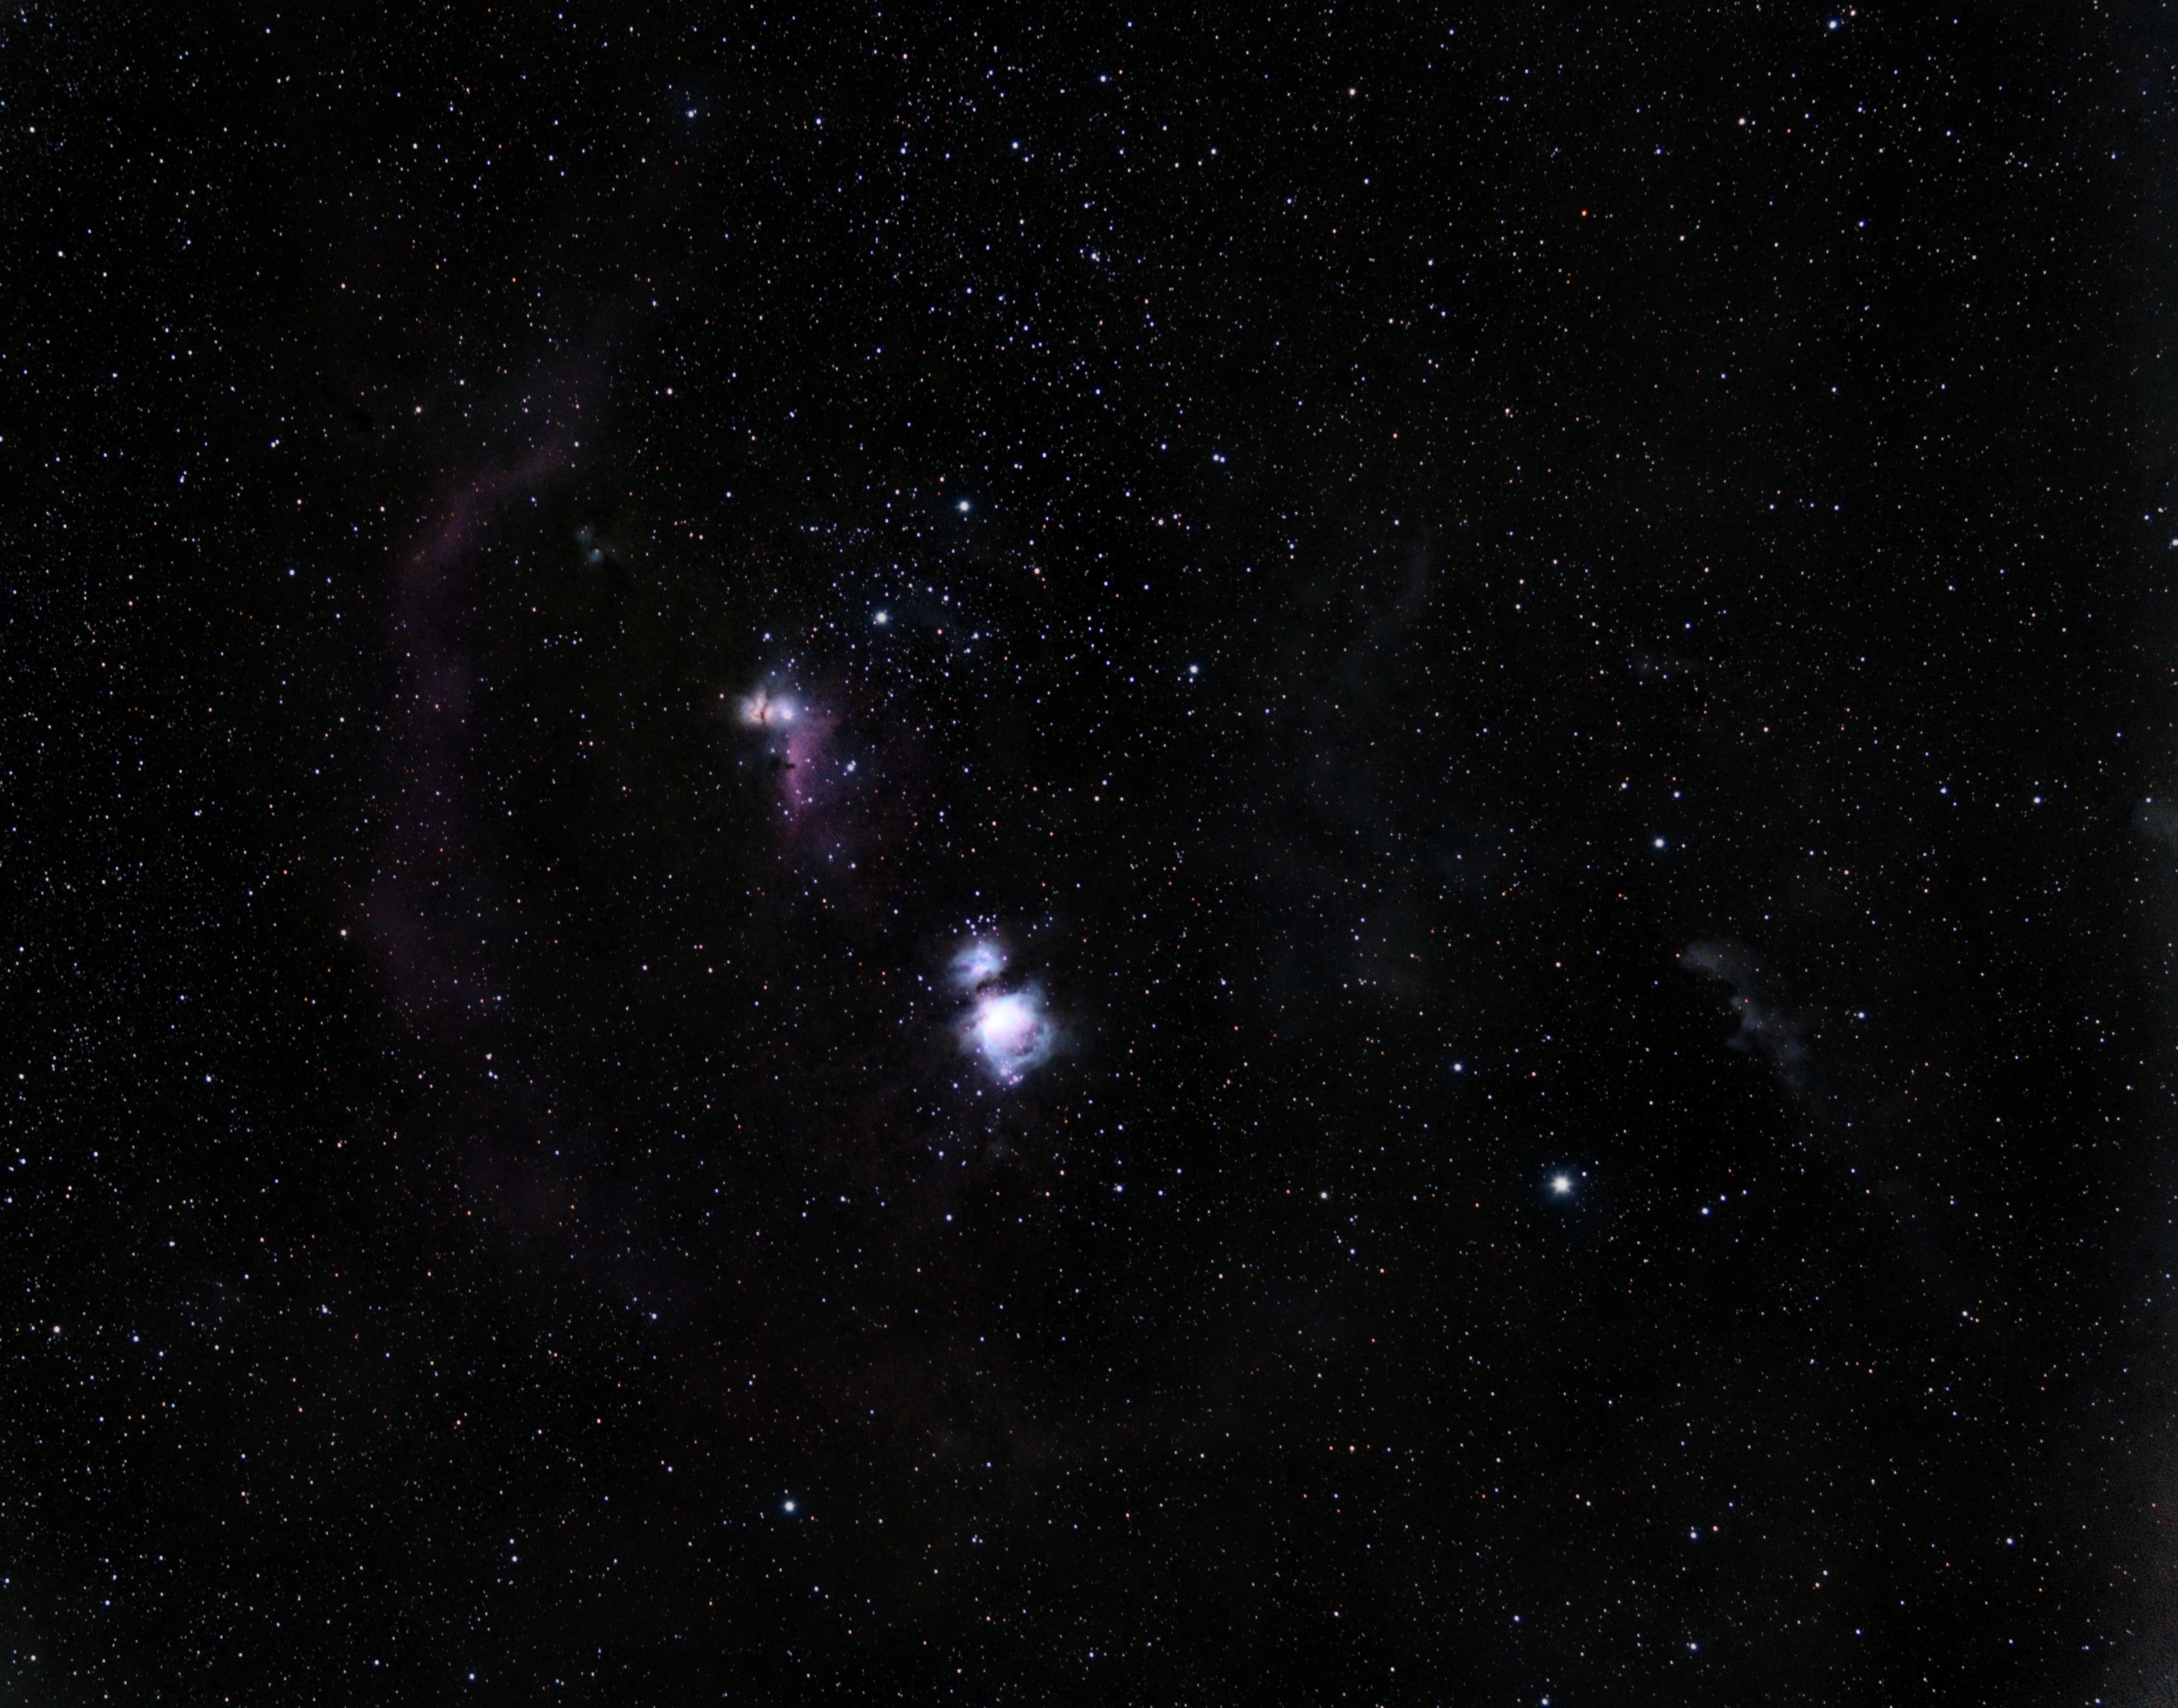
In the untracked version, I was limited to around 4 second exposures at ISO 1600. Even after stacking, the result shows the brighter parts of the Orion region, but the faint dust and outer structures are weak and harder to separate from the background.
With tracking, I was able to shoot 30 second exposures at ISO 800 using the same focal length. The total integration time was much higher, and the difference is very noticeable.
In the tracked image, you can clearly see more of the surrounding dust in the Orion molecular cloud complex. The Witch Head Nebula becomes more visible instead of barely detectable. The Horsehead region gains more structure, and even smaller objects like the Casper Nebula start to stand out.
There is also a practical difference beyond image quality.
When shooting untracked at 4 seconds, I needed a very large number of frames to build up enough total exposure time. That sometimes meant 1500 frames or more. Stacking that many images takes longer, and managing the data becomes more tedious.
Without tracking, you also need to constantly reframe the target as it moves across the sky. That interrupts shooting and costs time between exposures. And because reframing is never perfectly aligned, you usually end up cropping a significant part of the final image.
With tracking, the framing stays consistent. You shoot fewer frames because each one is longer, processing is simpler, and less of the final image needs to be cropped away.
Same camera. Same lens. Same backyard. The main difference was tracking and total exposure time.
Nikon D3400 Settings for Untracked Astrophotography
When shooting untracked on a tripod, this is the setup I use at 35mm.
Exposure settings
| Mode | Manual (M) |
|---|---|
| Shutter speed | 4 seconds |
| Aperture | f/2.8 |
| ISO | 1600 |
| Auto ISO | Off |
At 35mm, 4 seconds is about my limit if I want properly round stars. ISO 1600 helps compensate for the short exposure time. I keep Auto ISO turned off so the camera doesn’t change exposure between shots.
Stability settings
| Self-timer | At least 5 seconds. I prefer 10 seconds. |
|---|---|
| Vibration Reduction (VR) | Off |
| Built-in AF assist illuminator | Off |
The self-timer is important. When you press the shutter, the tripod can wobble slightly. Waiting 5 to 10 seconds lets everything settle before the exposure starts.
VR should always be off when the camera is on a tripod.
Image quality settings
| Image quality | RAW only |
|---|---|
| White balance | Auto |
| Active D-Lighting | Off |
| Long exposure noise reduction | Off |
| High ISO noise reduction | Off |
| Auto distortion control | Off |
I always shoot in RAW. JPEG throws away too much data, especially under light pollution.
I keep white balance on Auto because it doesn’t matter much in RAW. It can be adjusted later in processing.
Noise reduction features are turned off because I prefer to control noise during stacking instead of letting the camera process each frame individually.
Connectivity and battery
| Bluetooth | Off |
|---|---|
| Send to smart device | Off |
| Beep | Off |
| Monitor brightness | Max for focusing only, then reduce later |
I turn off wireless features to preserve battery. Beep is off for the same reason.
I increase monitor brightness only while focusing. It helps see stars better in Live View, but I don’t rely on the screen brightness to judge exposure.
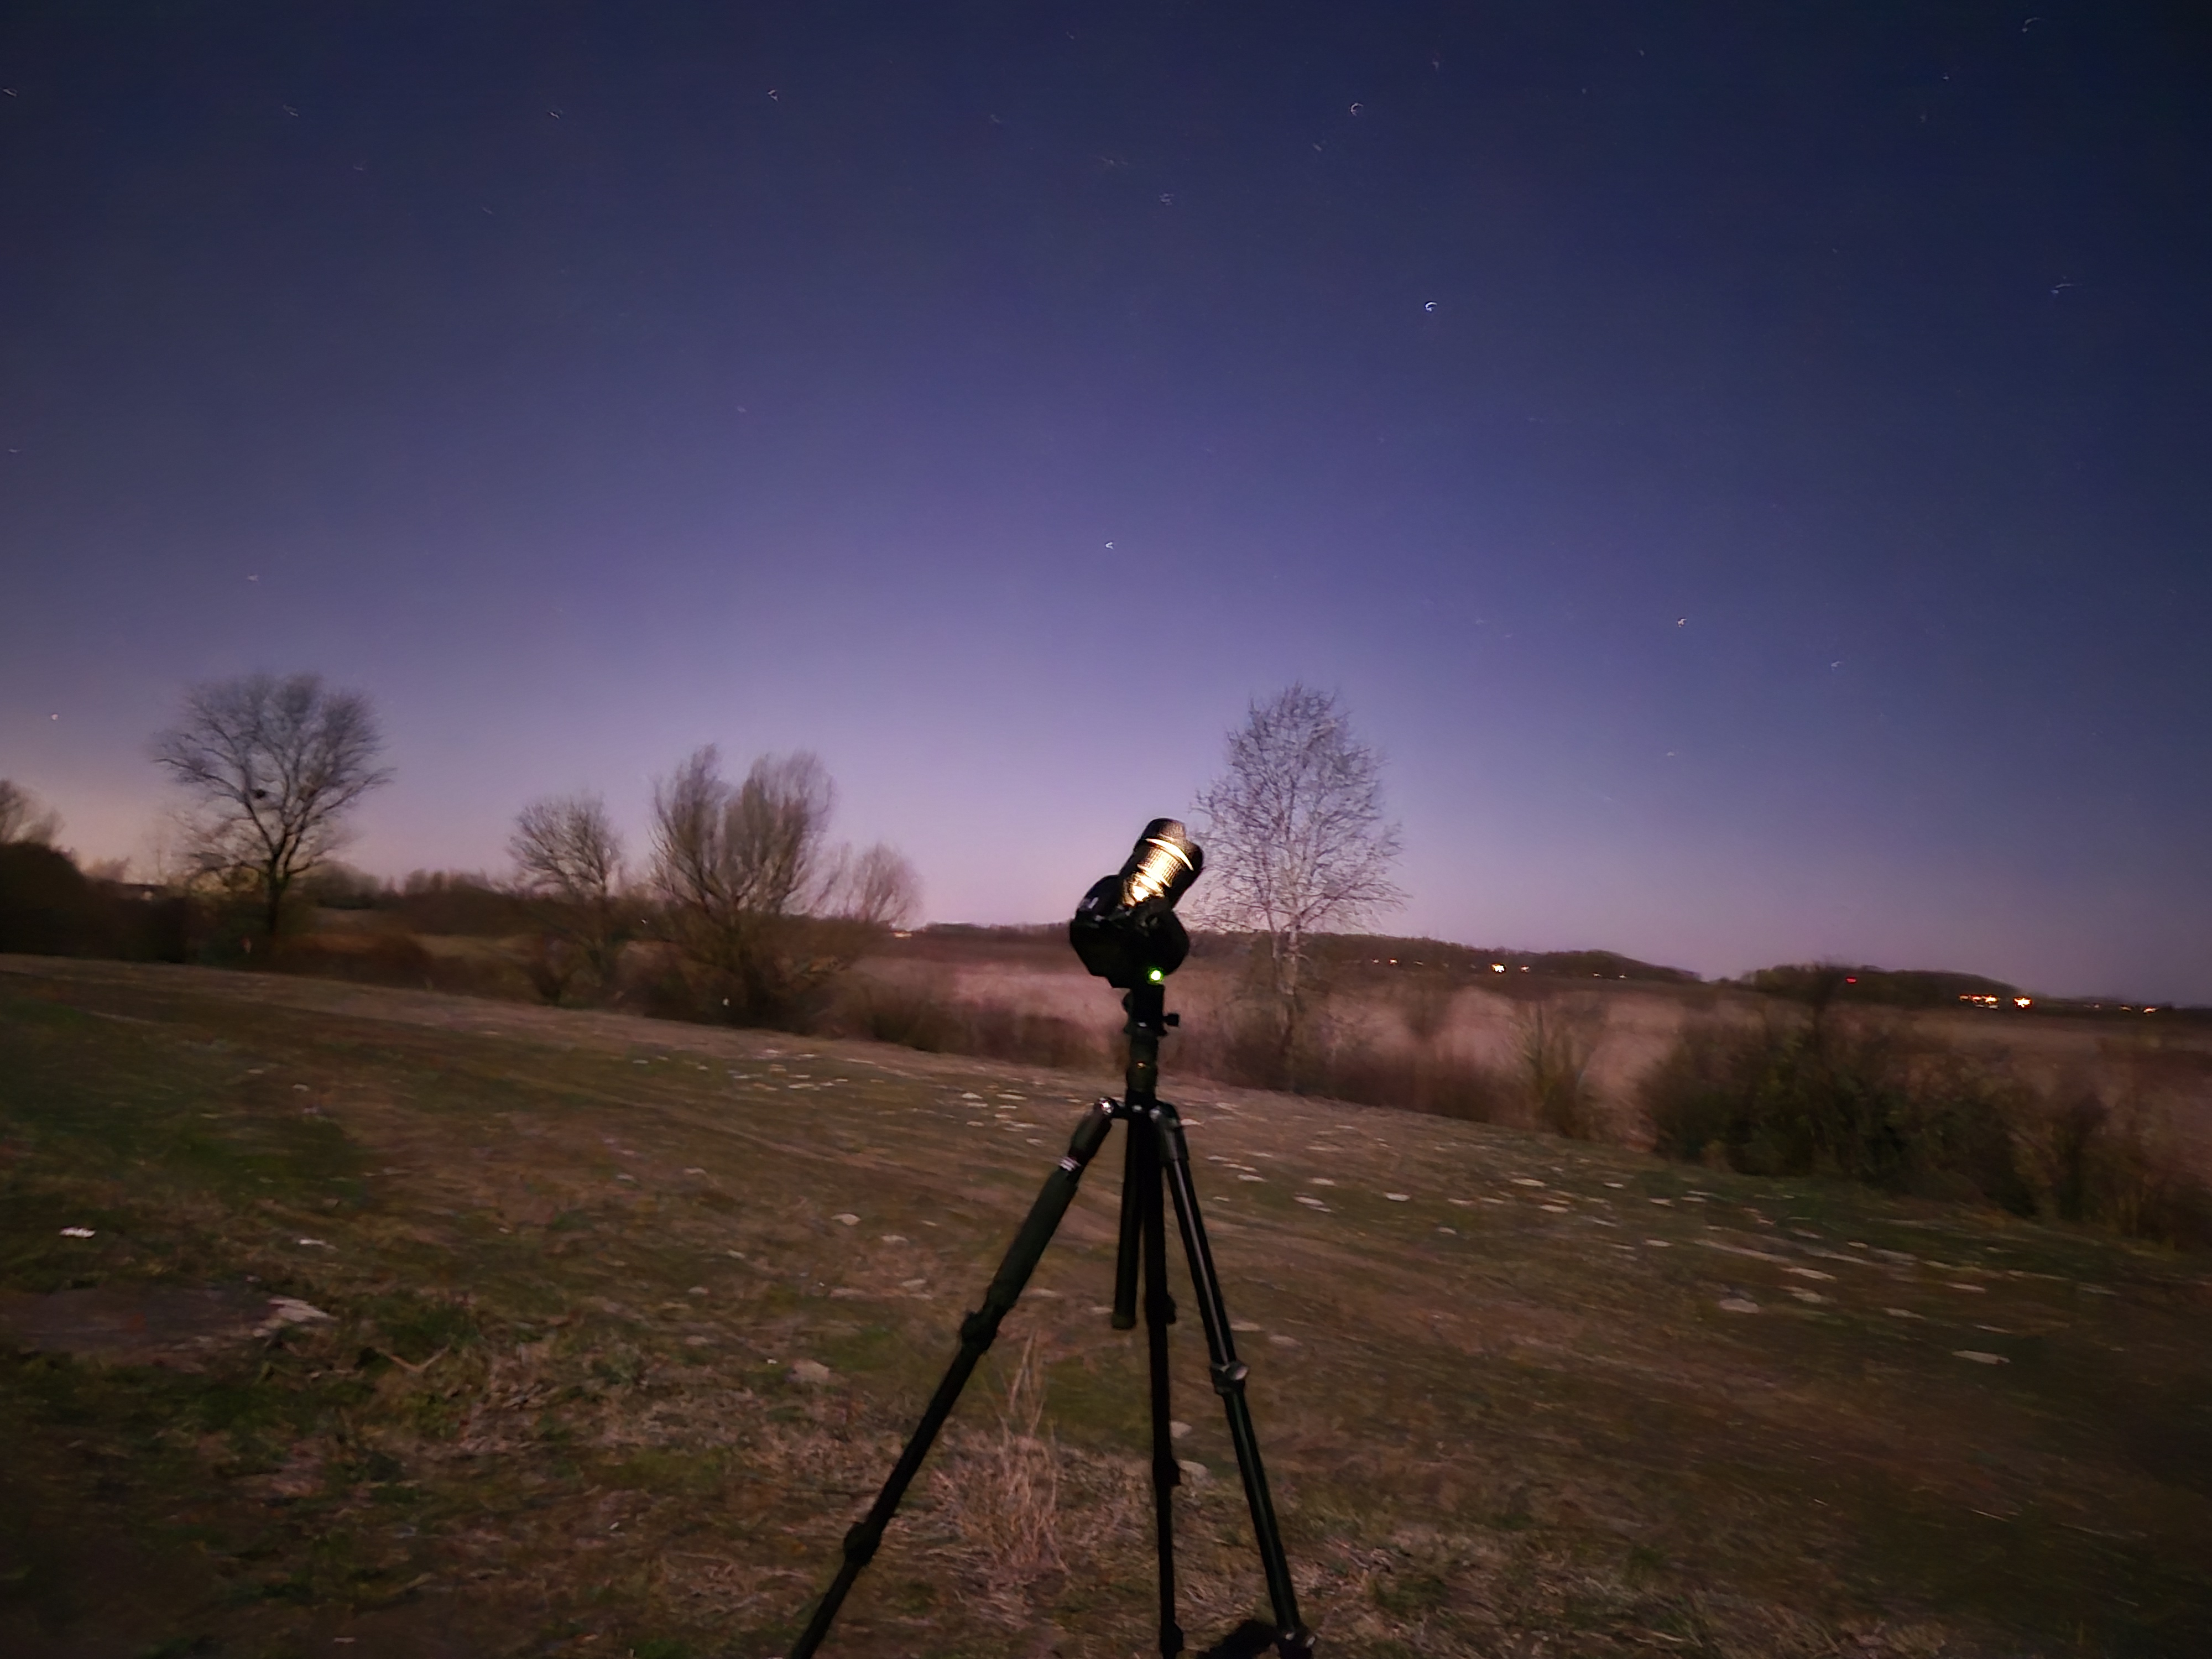
Untracked Nikon D3400 setup on a tripod.
Nikon D3400 Settings for Tracked Astrophotography
Once I added tracking, most of my camera settings stayed the same.
All of the following remain unchanged:
- Manual mode
- Auto ISO off
- RAW format
- Long exposure noise reduction off
- High ISO noise reduction off
- Active D-Lighting off
- Auto distortion control off
- VR off
- Self-timer or external control
- Bluetooth and smart device features off
What changes when tracking
| Shutter speed | Usually 30 seconds |
|---|---|
| ISO | 800 |
| Aperture | f/2.8, sometimes slightly stopped down if star shapes improve |
I have tested exposures up to 2 minutes, but I don’t yet feel comfortable going beyond 60-90 seconds regularly. From my backyard I cannot see Polaris directly, so getting perfect polar alignment is more difficult.
Right now I do a rough polar alignment using a compass, phone apps and drift alignment.
Lowering ISO from 1600 or 3200 down to 800 also makes a noticeable difference in noise. Each frame collects much more light than an untracked 4 second exposure, so stacking becomes cleaner and more efficient.
Aperture usually stays at f/2.8, but sometimes I stop down slightly if I notice better star quality in the corners. That depends on the lens.
Tracking doesn’t just improve image quality. It makes the entire session more stable and predictable.
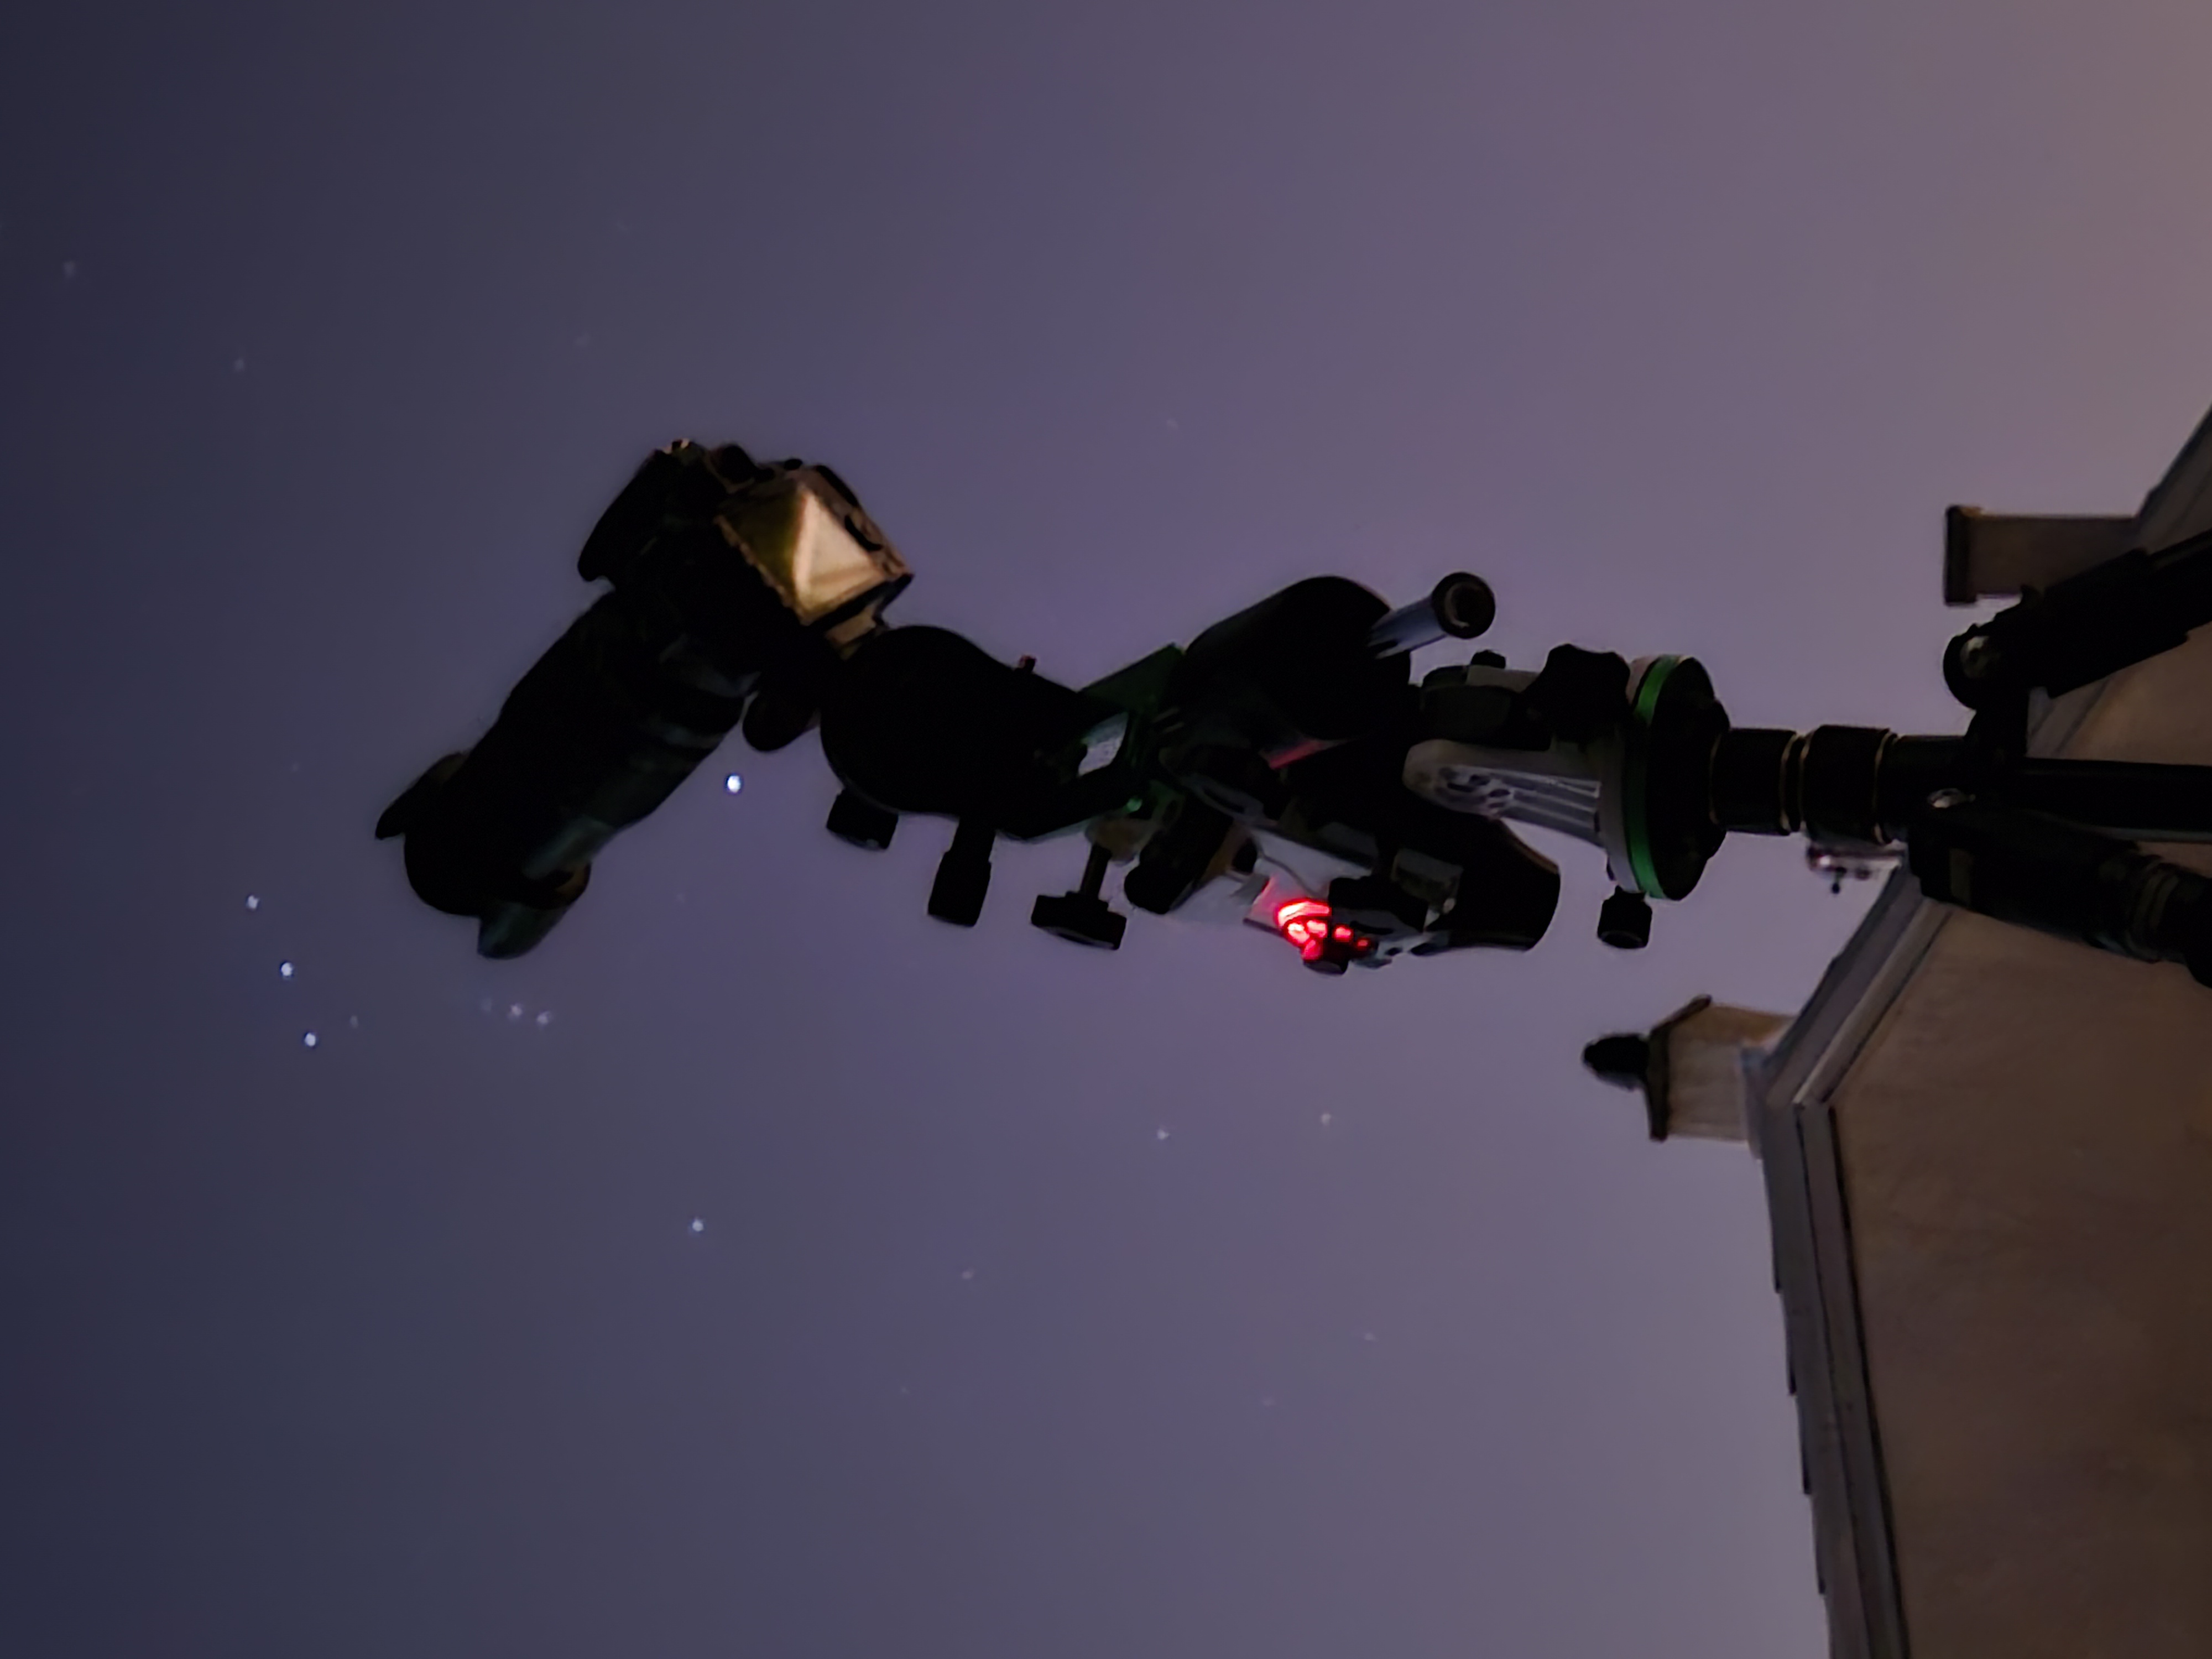
Tracked Nikon D3400 setup using a star tracker.
How I Focus the Nikon D3400 at Night
Focusing at night was harder than it sounded like, especially when using a non flip out DSLR screen.
This is the method I use.
First, I switch to manual focus and turn on Live View. Then I zoom in digitally on a bright star.
From there, I slowly rotate the focus ring back and forth. The goal is simple: make the star as small and sharp as possible. I don’t just turn the ring in one direction. I move slightly past focus, then come back, until I find the smallest point.
One thing that helped me a lot was using a headband magnifier with interchangeable lenses. It may look funny, but it makes a huge difference. The DSLR screen is small, and it’s hard to judge focus precisely. With the magnifier, I can clearly see when the star becomes smallest.
It’s also important that the camera is mounted firmly before adjusting focus. If the setup shakes while you turn the focus ring, it becomes much harder to see the change in star size.
Once I’m satisfied with focus, I place a small piece of painter’s tape over the focus ring. That prevents accidental movement. It also helps when attaching a lens warmer, since the ring can easily shift during installation.
I still check focus occasionally during the session, especially if temperature drops significantly.
Framing Is Harder Than It Looks, But Don't Overthink It
Framing a target sounds simple until you try doing it untracked.
When shooting without tracking, the sky constantly moves across the frame. That means you need to reframe the target often. It’s normal, and it’s part of the process.
When framing, I usually increase ISO and slightly increase shutter speed temporarily to make stars brighter on the screen. That makes it easier to judge composition.
I also pay attention to the stars near the edges of the frame. If the main object looks centered but the surrounding star field feels uneven, the final image might not feel balanced after cropping.
One important thing I learned is not to stress about cropping. Especially when shooting untracked, cropping is normal. Reframing is never perfectly aligned, and stacking will always require trimming the edges.
It’s better to leave some margin around your target instead of trying to frame it perfectly every time.
Tracking makes framing much easier because the target stays in place, and you don’t lose as much data at the edges.
Things I Learned Along the Way
These are simple lessons that made a big difference for me.
- You don’t need to delete frames where a plane or satellite passes through the image. During stacking, those streaks are rejected automatically.
- You don’t need an expensive tripod to begin with. A Nikon D3400 with basic lenses is not very heavy. Stability matters more than price. I started with a simple K&F tripod and it works fine.
- A lens warmer or dew heater helps a lot during winter. Once moisture builds up on the lens, the session is basically over. Preventing dew is easier than trying to fix it later.
- Two batteries are a must. I started with one battery and my sessions were short and frustrating. Now I keep one in the camera and one charging or warm in my pocket.
- Integration time really does matter. Small improvements in exposure length don’t compare to simply collecting more data.
Backyard Reality
Shooting from a backyard has its own limitations.
Light pollution is always present. I cannot see Polaris directly, which makes precise polar alignment harder. My horizon is partially blocked, and nearby house lights sometimes interfere.
It’s not a perfect location, but it’s accessible, and it's where I have my peace. And that means I can practice often.
Calibration Frames Are Worth It
When I first started stacking, I focused only on light frames. Later I realized that calibration frames make a noticeable difference, especially under light pollution.
At a minimum, I now try to include:
- Dark frames
- Bias frames
- Flat frames
Dark frames help reduce hot pixels and fixed-pattern noise.
Bias frames help with sensor read noise.
Flat frames correct uneven illumination and dust shadows.
Flats are especially important if you want clean backgrounds. Without them, gradients and vignetting become much harder to manage during processing.
Taking calibration frames does add extra time at the end of a session, but it saves time later when processing. The final result looks cleaner and more balanced.
For tracked projects where I invest several hours of exposure time, calibration frames feel like a must.
Start With What You Have
Astrophotography can become an expensive hobby very quickly. There is always better gear, better mounts, better cameras, and darker skies somewhere else.
But you don’t need all of that to begin.
I started with a Nikon D3400 and a simple tripod in my backyard which I'm still using. Slowly, I added a star tracker and have a dedicated astro scope on the way. I’m still building up both my astrophotography setup and my visual observation gear over time.
There is no rush.
You will have plenty of time to upgrade equipment. What matters more in the beginning is learning how the sky moves, how your camera behaves at night, and how total integration time changes everything.
This hobby is not something you “finish”. It’s something you grow into.
Start with what you have, be patient, and keep improving one session at a time.
Until the next post. Clear skies!